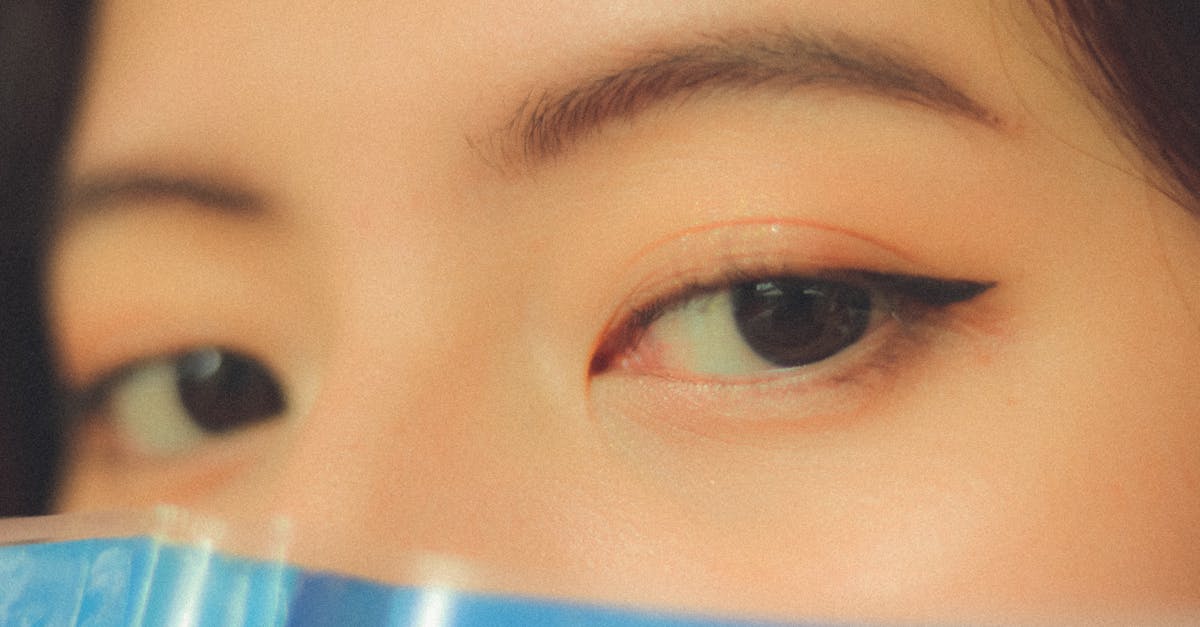
If you have hooded eyes, you already know the frustration: you spend ten minutes blending a gorgeous gradient, open your eyes, and it vanishes into your lid fold. Standard eyeshadow placement advice doesn’t quite apply when your crease disappears every time you look straight ahead.
The good news is that hooded eyes respond beautifully to a few targeted adjustments. You don’t need different products or complicated techniques. You just need to move your placement up and blend with purpose.
This page stays on powder placement: where color has to sit so you can still see it with the eye open. Look-by-look application lives on how to apply eyeshadow for hooded eyes. Blending motions and brush size live on how to blend eyeshadow for hooded eyes. Cream crayons and twist-ups live on best eyeshadow sticks for hooded eyes. Those URLs stay live.
Amazon “best hooded eye palette” lists will sell you more pans. More pans do not move the fold. Search results also mix generic crease tutorials filmed on an open lid. This URL is the visibility map.
The Beauty Desk does not run a lid-shape lab. The notes below come from published artist placement advice and the same open-eye check those sources keep repeating.
Who this page is for. Anyone whose crease work looks finished looking down and disappears looking ahead. People who keep buying shimmer because “the lid looks empty” when the color is sitting under the hood.
When to skip this page. If you want a crayon that sets before the hood wipes it, use the stick ranking. If you already know to place above the fold and need motions, use the blending sibling. If you only wanted a five-minute weekday menu, everyday eye looks stays a different URL. If the problem is oil, not hiding, start with the 10+ hour primer ranking.
Lid-type notes (hood plus something else). Oily hooded lids fail twice: the fold hides color and the wipe smears it. Prime thin, wait until dry, then place. Deep-set plus hooded: do not drag the faux crease so high it reads as a bruise on the brow bone. Mature hoods: matte above the fold, satin on the visible sliver — shimmer on the hood skin catches every line. A drugstore mid-matte is enough once placement is right; a beginner palette helps only if you still need shade jobs.
How to Know If You Have Hooded Eyes
Hooded eyes have a fold of skin that partially or fully covers the crease when the eyes are open. The mobile lid (the part between your lash line and your crease) appears smaller or even invisible.
This eye shape is extremely common. It can be genetic or develop naturally with age as the skin above the eye loses elasticity. Celebrities like Blake Lively, Jennifer Lawrence, and Taylor Swift all have some degree of hooding, which should tell you it’s not a flaw to correct. It’s a shape to work with.
Step 1: Prime Everything
Primer matters even more on hooded lids than other eye shapes. The skin-on-skin contact where the fold meets the lid creates a warm, often oily environment where shadows crease and transfer. Apply a thin layer of eyeshadow primer from lash line to brow bone, then set it with a light dusting of translucent powder.
If you don’t have a dedicated eye primer, a thin layer of concealer set with powder works as a stand-in. The goal is a dry, slightly tacky surface that grips pigment. Concealer is a stand-in, not a 10-hour oily-lid primer. Wear-time rankings live on best eyeshadow primer for oily lids. Application order (blot, thin primer, wait, powder) lives on oily-lid primer tips.
Step 2: Apply with Your Eyes Open
This is the single most important habit to build. When you apply shadow with your eyes closed, you can’t see where the fold lands. You end up placing your crease shade where it disappears entirely.
Instead, look straight into a mirror and apply your transition and crease shades with your eyes open. You’ll immediately see how high you need to take the color for it to remain visible. This feels awkward at first because you’re essentially working against the pull of your eyelid, but it becomes second nature within a few tries.
Beauty Desk note (not a lab test): Sit with your chin level, not tipped into a compact. Color that looks perfect with the chin down is often parked exactly where the hood will cover it. If you cannot see the mid-matte in that straight-ahead mirror, raise it. Do not press harder into the hidden crease.
Step 3: Create a Faux Crease
Your natural crease hides, so you make a new one. Using a matte shade a few tones darker than your skin, mark a line slightly above where your natural crease falls. When your eyes are open, this line should be visible just above the fold.
Blend this shade using small windshield-wiper motions with a fluffy brush. Keep checking with your eyes open to make sure the color sits where you want it. The new crease should arc gently upward toward the tail of your brow, not droop downward at the outer corner.
Step 4: Add Shimmer on the Mobile Lid
Place your lid shade (ideally a shimmer, satin, or metallic) on the mobile lid only. Pat it on with your finger or a flat shader brush. Don’t sweep it upward or you’ll push it into the fold where it smudges.
A light, reflective shade here catches light and draws attention to the visible part of your lid when your eyes are open. Champagne, gold, and soft pink shimmer shades are particularly effective because they brighten the eye area without competing with the deeper crease work above.
Step 5: Deepen the Outer Corner
Take a darker matte shade on a small, dense brush and press it into the outer corner of your eye. Blend it upward and slightly outward — never downward, which drags the eye shape. The darkest point should sit at the outermost edge of your lash line and then feather up toward your faux crease.
For hooded eyes, keeping the outer corner lifted is critical. Any shadow that dips below the outer corner of the eye creates a droopy appearance. Aim the shadow toward the tail end of your eyebrow as your directional guide.
Step 6: Eyeliner Strategy
Heavy liner on hooded eyes tends to vanish or smudge. Instead of thick lines, try these approaches:
Tightlining works beautifully. Push a dark pencil or gel liner into the spaces between your upper lashes. This defines the eye without taking up valuable lid space.
Thin liner with a lifted wing is the second option. Draw the thinnest possible line along your lash line, then flick the wing outward and slightly upward. Check the wing with your eyes open — on hooded eyes, the wing angle often needs to be sharper than you’d expect to avoid it folding into the crease.
The batwing technique is specifically designed for hooded eyes. Draw your wing from the outer corner with your eyes open, then connect it back to your lash line. When your eyes are closed, it looks like a bat wing shape. When open, it appears as a clean, lifted line.
Step 7: Finish with Lower Lash Definition
Apply a soft, warm-toned shadow along your lower lash line to balance the depth on top. This ties the whole look together and prevents the top half of the eye from looking disconnected from the bottom.
Use a small smudge brush and keep the color focused on the outer two-thirds of the lower lash line. A tiny dot of shimmer on the inner corner brightens the eye and makes it appear more awake.
Common Mistakes with Hooded Eyes
Blending too wide. On hooded eyes, shadow that extends too far toward the temples creates a muddy mess rather than a defined shape. Keep your shadow within the boundaries of your orbital bone.
Using all shimmer. Shimmer in the crease or above it catches every fold and wrinkle. Reserve shimmer for the mobile lid and inner corner only. Use matte shades for all contouring and crease work.
Ignoring curl and mascara. Curled lashes open up hooded eyes dramatically. Use an eyelash curler before mascara, and consider a waterproof formula that holds the curl throughout the day.
Following tutorials for other eye shapes. Most eyeshadow tutorials are demonstrated on eyes with a fully visible crease. Adapt the technique to your anatomy rather than copying placement exactly.
Product Tips for Hooded Eyes
Long-wearing formulas matter more for hooded eyes than almost any other shape. The constant contact between your lid and the fold transfers product, creases foundations, and smudges liner. Waterproof mascaras, tubing mascaras, and setting sprays are worth the investment.
For eyeshadow, pressed formulas tend to perform better than loose pigments, which can fall into the fold and create unwanted creasing. If you love shimmers, cream-to-powder formulas and liquid shadows tend to stay locked in place better than traditional pressed shimmers.
Frequently Asked Questions
Can I still do a smokey eye with hooded eyes?
Absolutely. The key is to extend the darker shades above your natural crease so the smoky effect is visible when your eyes are open. Keep checking your placement with eyes open and blend upward, not outward. Start with the brown-first beginner method before you pack black on a small visible lid.
Will my eyeshadow always crease?
With proper primer and long-wearing formulas, creasing becomes minimal. Setting your primer with powder and avoiding cream shadows in the crease area also helps.
Should I avoid cut creases on hooded eyes?
Cut creases actually work well on hooded eyes because they create a defined boundary between the lid and the fold. Use concealer to carve out the crease line, then set it with powder before applying your lid shade.
Sources
- Revlon Beauty. (2025). “Eye Shadow Tips for Hooded Eyes.” revlon.com.
- Harper’s Bazaar. (2025). “How to Apply Eyeshadow on Hooded Eyes.” harpersbazaar.com.
- L’Oréal Paris USA. (2025). “The Best Makeup Tips for Hooded Eyes.” lorealparisusa.com.
Related Guides
- How to Apply Eyeshadow for Hooded Eyes
- How to Blend Eyeshadow for Hooded Eyes
- Best Eyeshadow Sticks for Hooded Eyes
- Best Drugstore Eyeshadow Palettes
- Best Eyeshadow Palette for Beginners
- Best Eyeshadow Primer for Oily Lids (10+ Hours)
- Smokey Eye Tutorial for Beginners
- Smokey Eye Tutorial: Step-by-Step for Beginners
- Everyday Eye Shadow Looks You Can Do in 5 Minutes
- Cut Crease Tutorial
- Eyeshadow for Glasses Wearers
- Eyeshadow for Mature Eyes
Get weekly eye care & beauty tips
Guides from the Eyeshadow Looks Beauty Desk. No spam, ever.
Related Articles
 tutorials
 How to Apply Eyeshadow for Beginners: Step-by-Step Guide (With Pictures)
Read Guide arrow_right_alt tutorials
 Eyeshadow for Beginners: The Complete Starter Guide
Read Guide arrow_right_alt tutorials
 Best Eyeshadow for Beginners: Step by Step Guide
Read Guide arrow_right_alt tutorials
 Smokey Eye Tutorial: Step by Step for Beginners
Read Guide arrow_right_alt tutorials
 Smokey Eye Tutorial for Beginners: A Foolproof Method
Read Guide arrow_right_alt tutorials